First good news :
I called Hubby’s doctor since well we didn’t get a call from them (hate that) and I talked to him. He wanted to wait until Hubby’s appointment but we needed to know wether it was cancer or not. He did tell us that it is not cancer (YEAH!!!!!) Other details will have to wait for the appoinment, which is fine with me. I can relax a little now.
Second good news:
I wrote out my pattern for the fingerless mitts. It took me longer then I thought it would. It took me all morning for me to get the chart on my computer and to get it into my blog ( I write my blogs out first on Appleworks then copy and paste). What a pain in the butt but I have it done!! (still working on getting that darn chart uploaded)
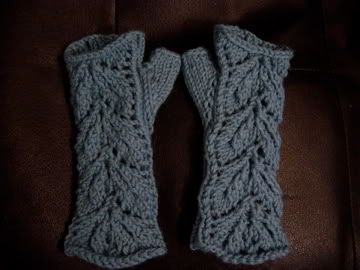
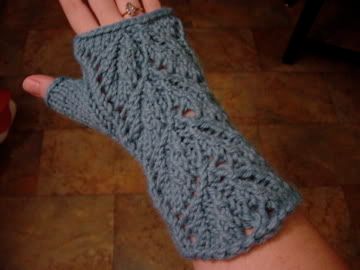
TaDa. Here it is. I named it Keri. I named it after Keri who is hosting the Fingerless Mitts KAL. I would not have designed them if not for the KAL so as a way to say thank you I named them after her.
*** Please excuse this interruption for some important information :My friend, Jill, is doing a walk to fight breast cancer and she is having a contest. Please go check out her blog and donate if you can. The more money raised the better we will be able to fight this demon. Thank You. We now return you to the scheduled blog****
Keri
-KnitPicks Sierra (now named Cadena).( I used one hank and I had eactly 1 yard out of 110 yards left over. If you use another bulky yarn please have a little extra just in case.)
-size 10 dpns (I used 4)
CO - cast on
BO - bind off
K -knit
P-purl
PM- place marker
SM- slip marker
M1- increase 1 (use your favorite way to increase)
N1 - needle 1
N2 - needle 2
N3 - needle 3
PU - pick up stitch
K2tog - knit the next 2 stitches together
CO 33, divide stitches - N1- 9, N2- 15, N3 - 9
N1 and N3 will be K2 P2 ribbing throughout entire mitt.
N2 is the lace section - using the chart
For Both Mitts:
N1 and N3 ribbing
N2 knit across
Repeat one more time
N1 and N3 - ribbing
N2 start chart
Repeat chart twice
Thumb Gusset for Left Mitt.:
(you should be on row 1 of chart 3rd repeat)
N1- P1,K2,P2,K1,PM,M1,PM,K1,P2
N2 - chart row 1
N3 - ribbing
(the markers should be in the last K2 on N1)
next round
N1 - P1,K2,P2,K1,SM,K1,SM,K1,P2
N2 - chart row 2
N3 - ribbing
next round
N1 - P1,K2,P2,K1,SM,M1,K1,M1, SM,K1,P2
N2 - chart row 3
N3 - ribbing
next round
N1 - P1,K2,P2,K1,SM,K3,SM,K1,P2
N2 - chart row 4
N3 - ribbing
Continue increasing every other round (M1 right after 1st marker and M1 right before 2nd marker) until there are 11 stitches between markers then just knit across until finished row 3 of chart on 4th repeat.
Both Mitts 2:
On the next round (it should be row 4 of chart) when you get to the first marker - remove marker and place the 11 stitches on a holder or waste yarn then K1 P2
N2- chart row 4
N3- ribbing
Continue until last row of chart then:
N1 - ribbing
N2 - K across
N3 - ribbing
BO in pattern (knit the knit and purl the purl)
Thumb:
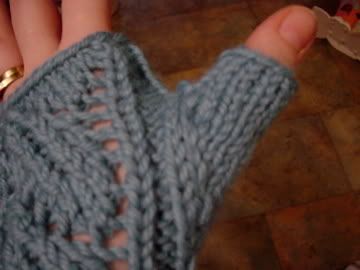
Round 1: (PU stitches where the thumb meets mitt)
N1- PU 1 stitch from mitt, slip 3 from holder/waste yarn
N2 - slip 5 from holder/waste yarn
N3 - slip 3 from holder/waste yarn PU 1 stitch
(13 stitches)
Round 2:
N1 - K2tog K2
N2 - K5
N3 - K2, K2tog
(11 stitches)
Round 3,4,5 - K around
Round 6 - BO loosely
Weave in ends. If there is still a gap where thumb meets mitt use the tail to close it.
Right Mitt:
Repeat directions For Both Mitts.
Thumb Gusset for Righ Mitt:
Again row 1 of 3rd repeat
N1 - ribbing
N2 - chart row 1
N3 - P2,K1,PM,M1,PM,K1,P2,K2,P1
(markers should be in the 1st K2 on N3)
next row
N1 - ribbing
N2 - chart row 2
N3 - P2,K1,SM,K1,SM,K1,P2,K2,P1
Continue to increase the same way as left mitt until 11 stitches between markers then knit across until end of row 3 of 4th repeat of chart.
Repeat directions for Both Mitts 2 and Thumb.
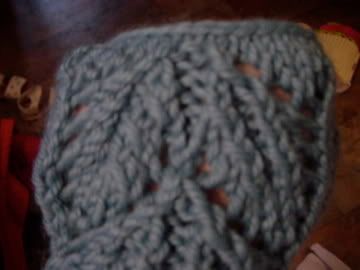
(Note about the chart. I could not get it uploaded- I am still working on it so in the mean time here a a nice picture of it. Sorry. The one I have on my computer is much better, but I am having problems, If i can not get the chart uploaded I will write it out)


Copyright - Qutecowgirl. This my pattern. Feel free to use it just remember not to say that it is yours. = ).
Any questions or problems with pattern email me at mrstank1(at)optonline(dot)net.
9 comments:
Congrats on the good news! This will make the weekend and coming days much easier for you all. The pattern looks great...I think this might have to be put on my to do list!
So happy for you and Hubby! I kept checking your blog Thursday and Friday and worried that, despite the conventional wisdom that no news is good news, the lack of news was bad news. What a relief!
Yea! Great news and great news...
I'll have to peek at the pattern more closely in a bit when I have more time, but thank you SO much for sharing it. You are awesome!
Oh my goodness I feel so special that the pattern is named after me! =) Great job!
Your mitts are beautiful!
Hi, I am trying this pattern but have found the needle configuration confusing regarding the rib section, so I started the k2p2 rib on needle 1, chart needle 2 and continued rib on needle 3 where I left off, but my markers for thumb have not ended up on the k2 section? Some more explanation on the k2p2 setup needles would be beneficial, thanks
wow, your mitten is great. may i share your blog in my fb? thank
I knitted a pair of these gloves YEARS ago - probably almost 10 years ago - and I love them. I've been wanting to make another pair, but I lost your pattern in a computer crash, and hadn't been able to find it again. Thanks to a Google image search which led to a link which led to a link ... I FOUND IT AGAIN TODAY! I am so happy! I'm going to make a (slightly modified) pair in green (my original pair were in Ivory) and if I can, I'll post photos here when they're done. (Can I do that?) Thank you for this wonderful pattern! Thank you SO much! :D
Toni
Hi there! Does anyone have the lace part written out? I can't seem to be able to follow the chart (how embarrassing!) Thank you!!
Kelly
Post a Comment